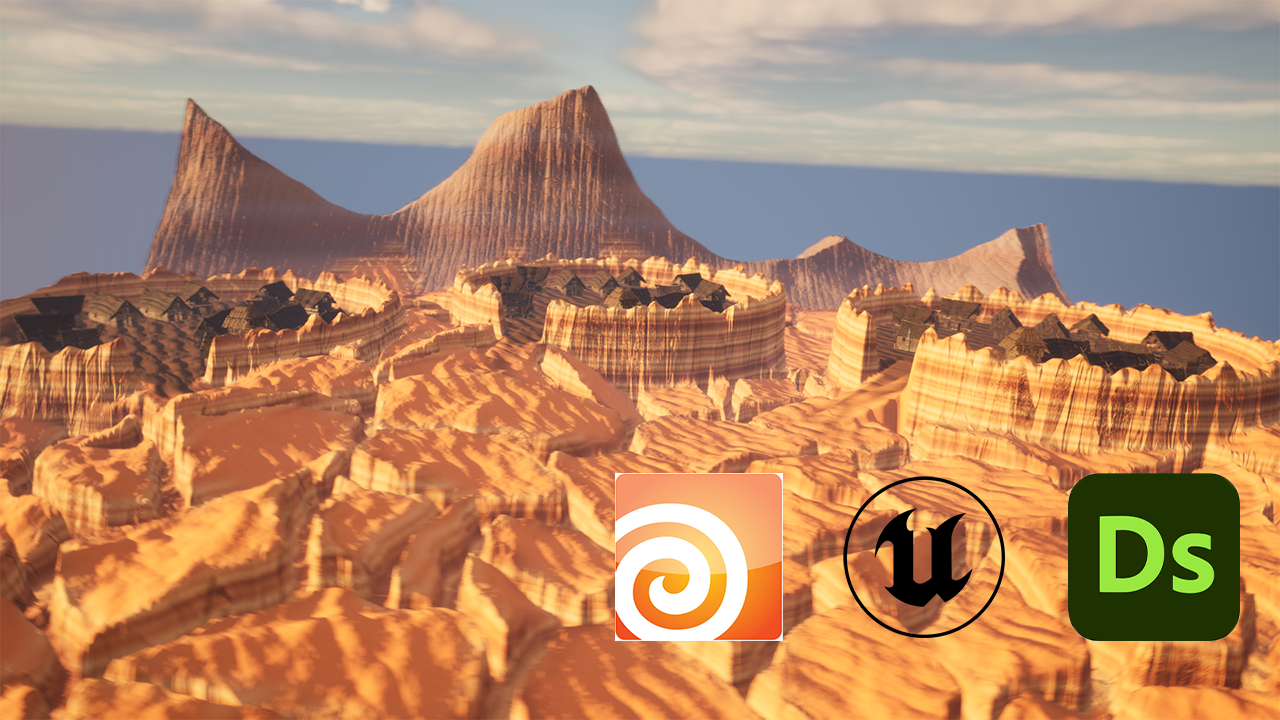
Houdini Engine Terrain Generator
Posted on December 4, 2023 • 6 minutes • 1155 words
Table of contents
I recently finished “The Way of Kings” by Brandon Sanderson, and was really inspired by his description of the Shattered Plains. The idea of this landscape, seemingly shattered by a colossal force was fascinating, and I got me thinking, hey that sounds a lot like some of the voronoi destruction tools in Houdini, I bet I could make a tool that would generate the terrain, and based on user input, design some of the landscape materials, and end up with a really cool looking scene! So, that’s exactly what I did!
Alright, if all you were interested in was the pretty pictures, I hope that video satisfied. However, if you’re interested in more insight into my process, Keep reading!
My objective with this was to create something that would be a useful landscape tool with Houdini that I could use to create this interesting landscape, design some awesome materials using Substance Designer, and then tweak and render the scene in Unreal Engine.
Houdini
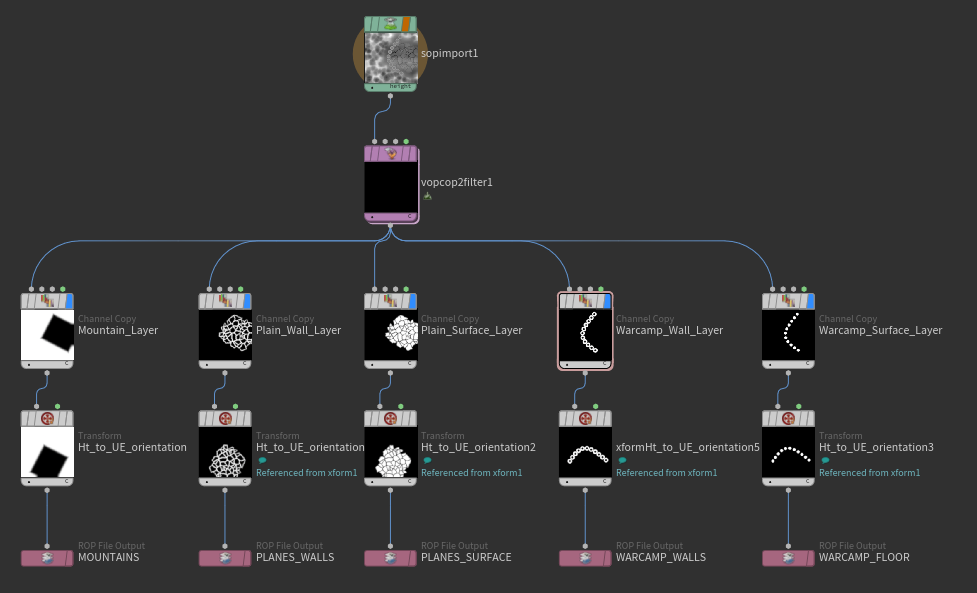
So, to start I cracked open houdini and started fleshing out my landscape. I split it into three sections, one to control the shattered plains, one to control the surrounding mountains, and one to create the warcamps.
For the plains, I knew I wanted to be able to control where they were generated, how many plains were created, and how deep and wide the caverns between each plain was. Eventually, I ended up wit the graph and paramteres below.
 The controls for the shattered plains part of the tool |
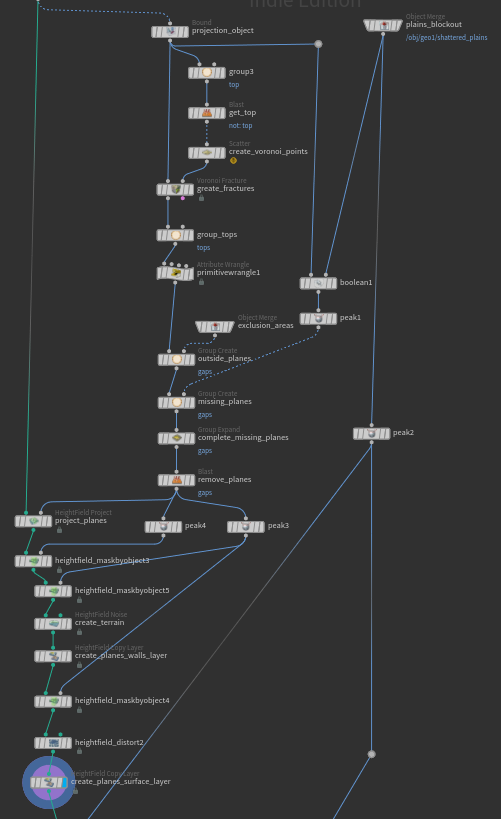 The Node Graph for the shattered plains |
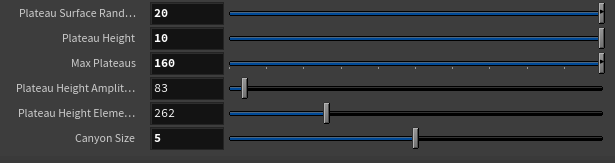
Next, I went to work on creating some mountainous terrain for the shattered plains to be nestled in. I knew the inspiration for this terrain was Zion national park and Bryce Canyon national park, so I tried to make mountains that were flattened out, almost like canyons, with lots of heat erosion.
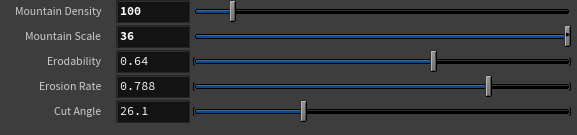 The controls for the mountains part of the tool |
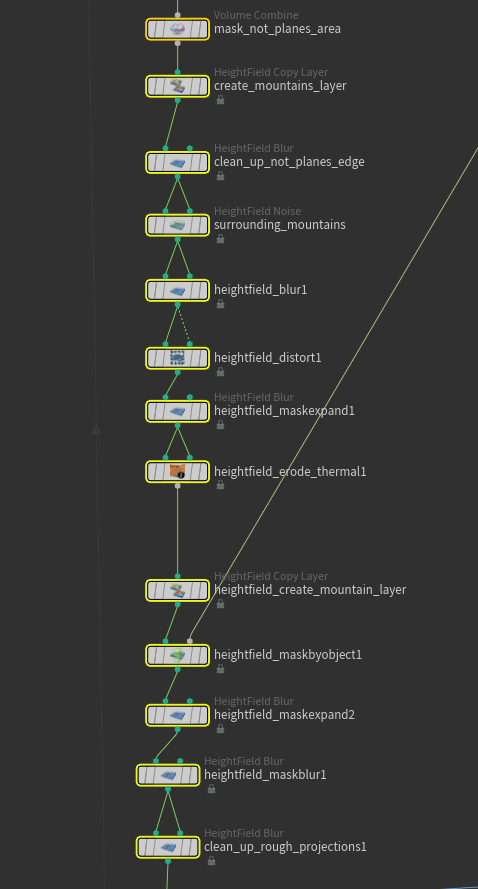 The Node Graph for the mountains |
After that, I flushed out the warcamps. They’re described as being, basically, carved into the landscape, so I wanted to make walls of cliffs, that would look the same as the surrounding rock. Again, with a focus on being able to tune this in engine, so I could get it looking just right before the final glamor shots, I wanted to be able to choose where the camps would be generated, how high the walls would be, and I wanted to be able to tweak the rock effect.
 The controls for the warcamp part of the tool |
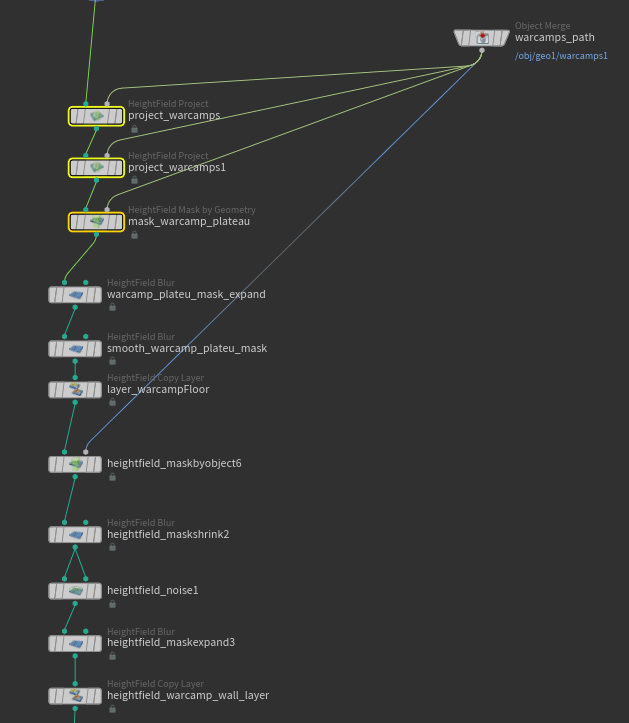 The Node Graph for the warcamps |
Penultimately, I needed to add some considerations for how this whole thing would be built in engine. I wanted to be able to adjust the resolution, size, and texture layers so that I could regenerate the scene on the fly. I was able to tell the system what resolution and scale to generate the landscape at, and I was able to have it automatically assign the landscape material I wanted to use.
 The controls for the mountains part of the tool |
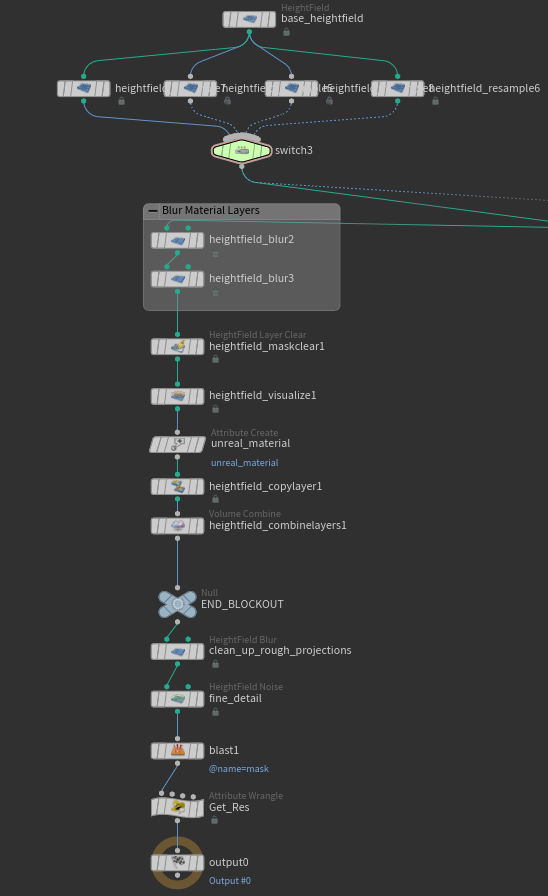 The Node Graph for the mountains |
Finally, I needed to get the texture Layers to load from Houdini into Unreal Engine and unfortunately the only layer unreal seemed interested in importing was the height layer. And after I spent so much time mapping out the material layers in Houdini! I was not about to paint that all by hand, I place way to much value on automation for that. Plus, I had all of that data calculated as a part of creating the landscape, I really wanted to be able to use it.
Fortunately, I was able to embed a COP network in the HDA that would render the material layers out as a png, which I could import to the landscape form inside Unreal Engine. This workflow ended up working out great, once I realized that buttons only work if you have realtime updates enabled in engine, so if you have buttons in your HDA that aren’t working in Engine, check that setting!
Substance Designer
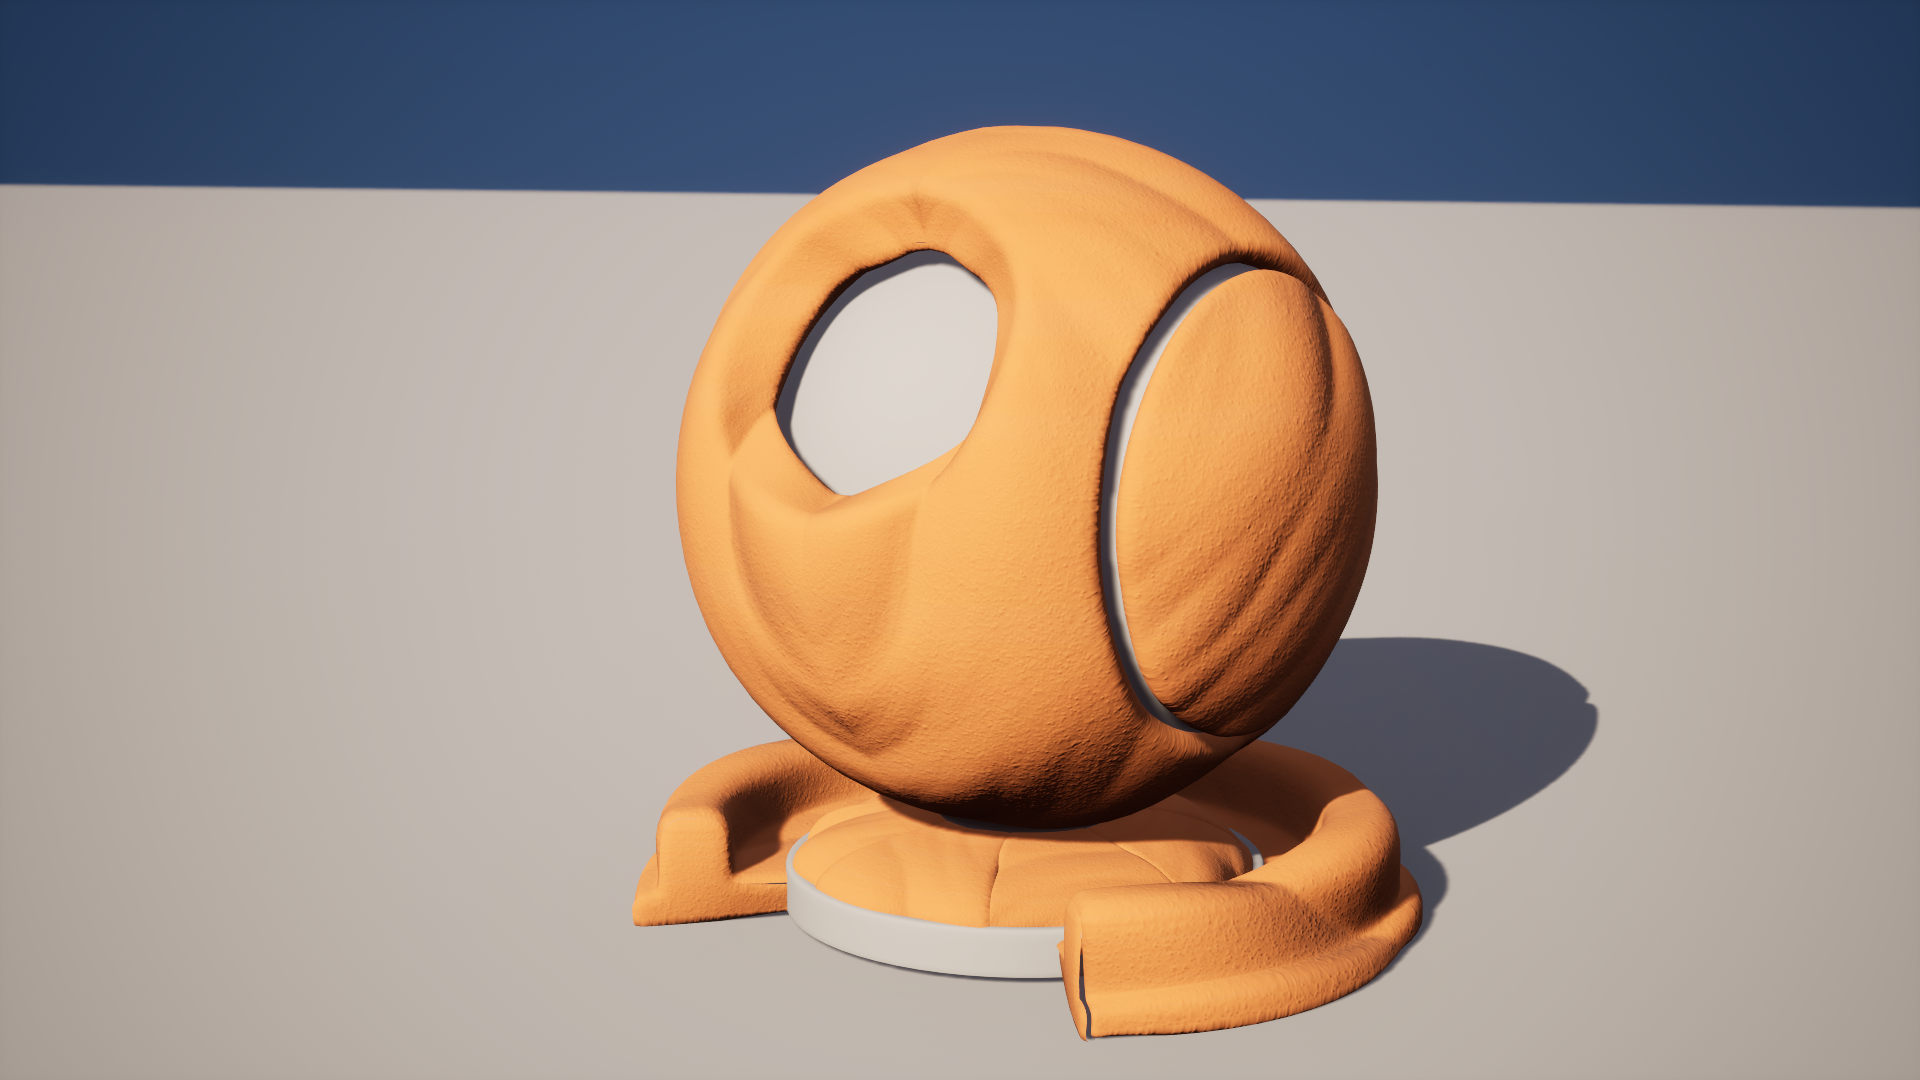
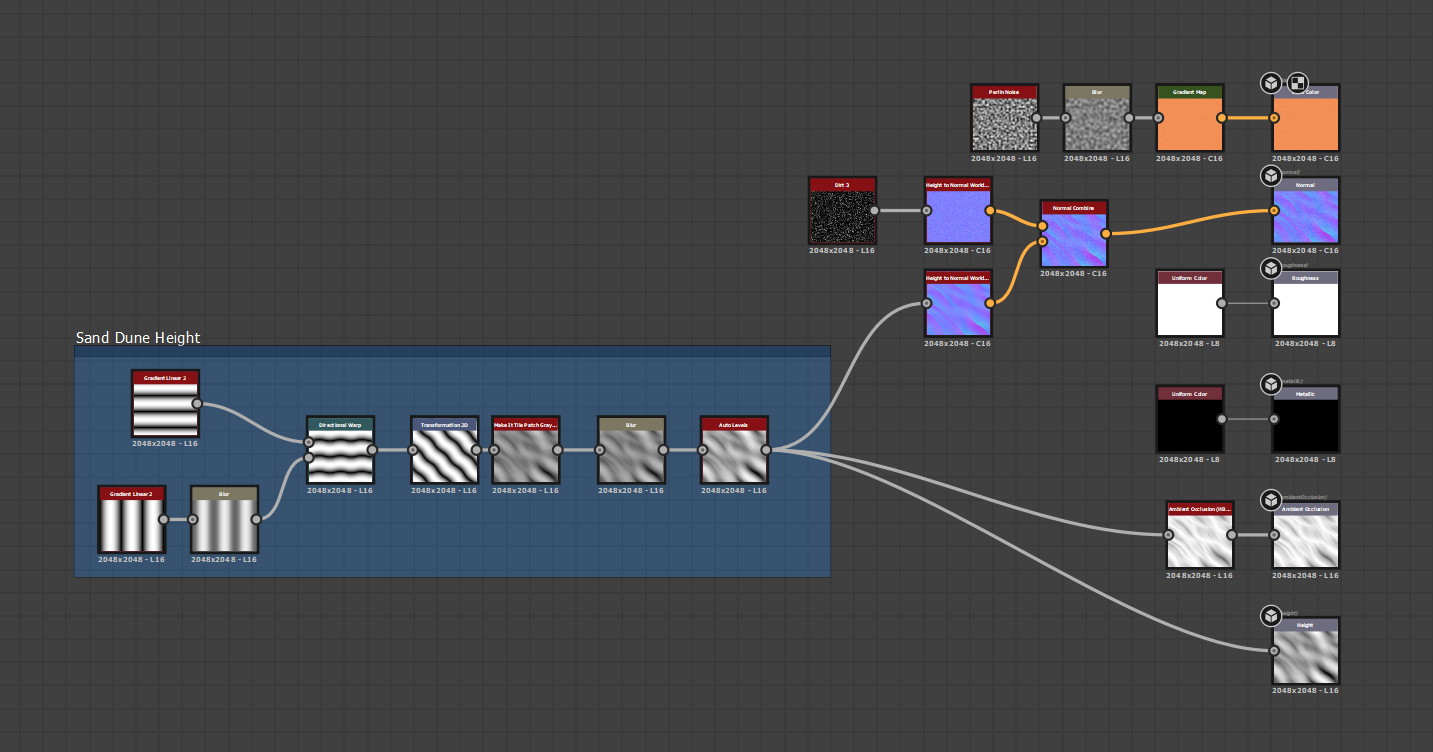
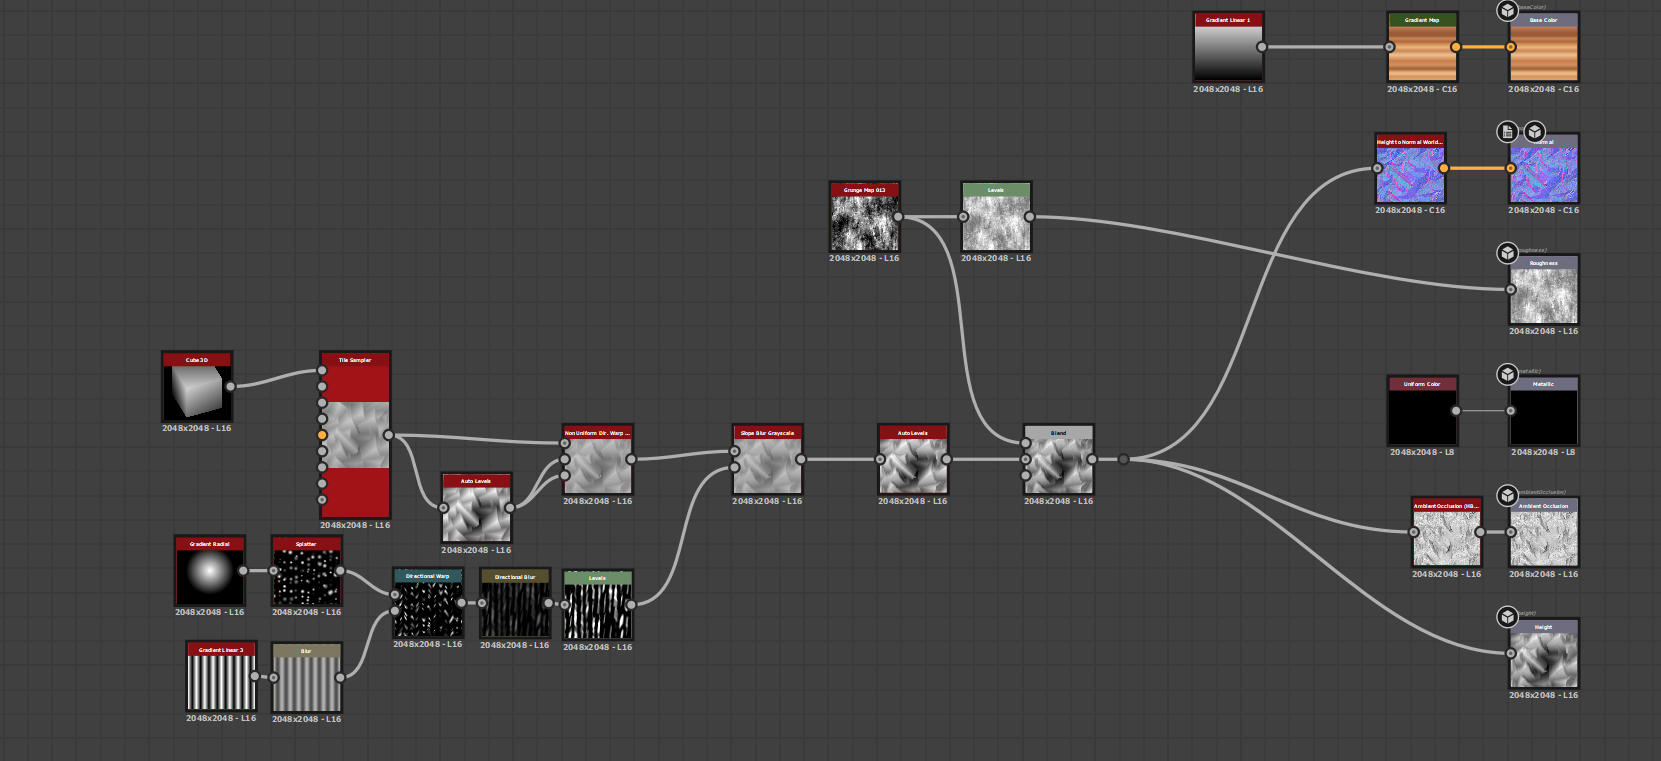
Now that I had the geometry, it was time to make some awesome textures. To cover the bulk of what I needed, I wanted to create two types of cliff faces, and one sort of sandy dirt material to use as a the surface. You can see a breakdown of the material graphs and some glamor shots below!

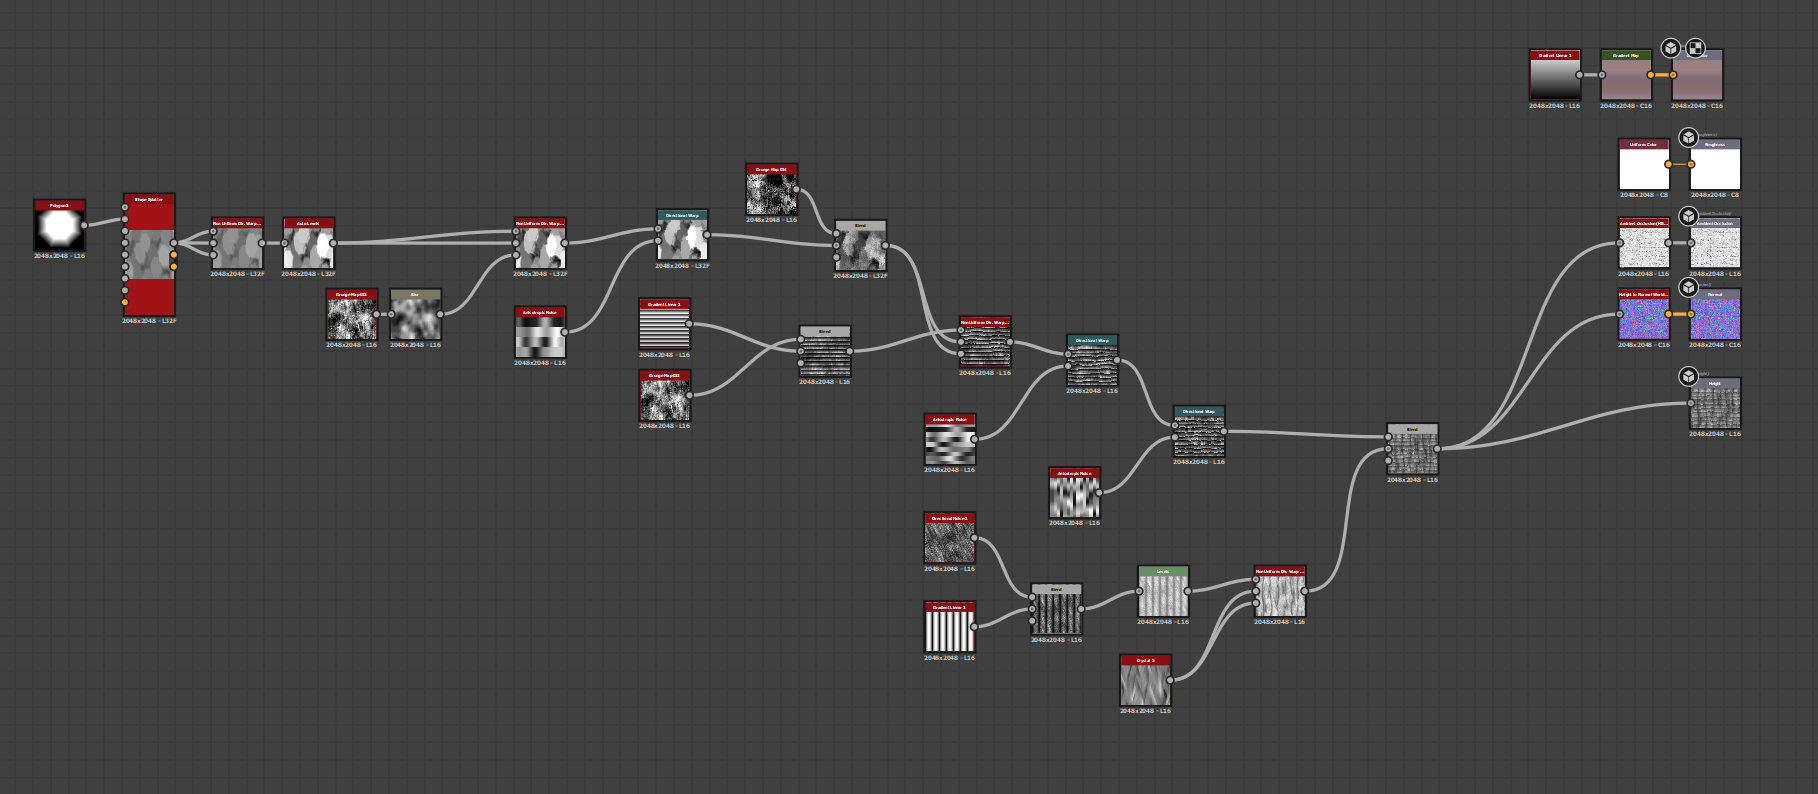
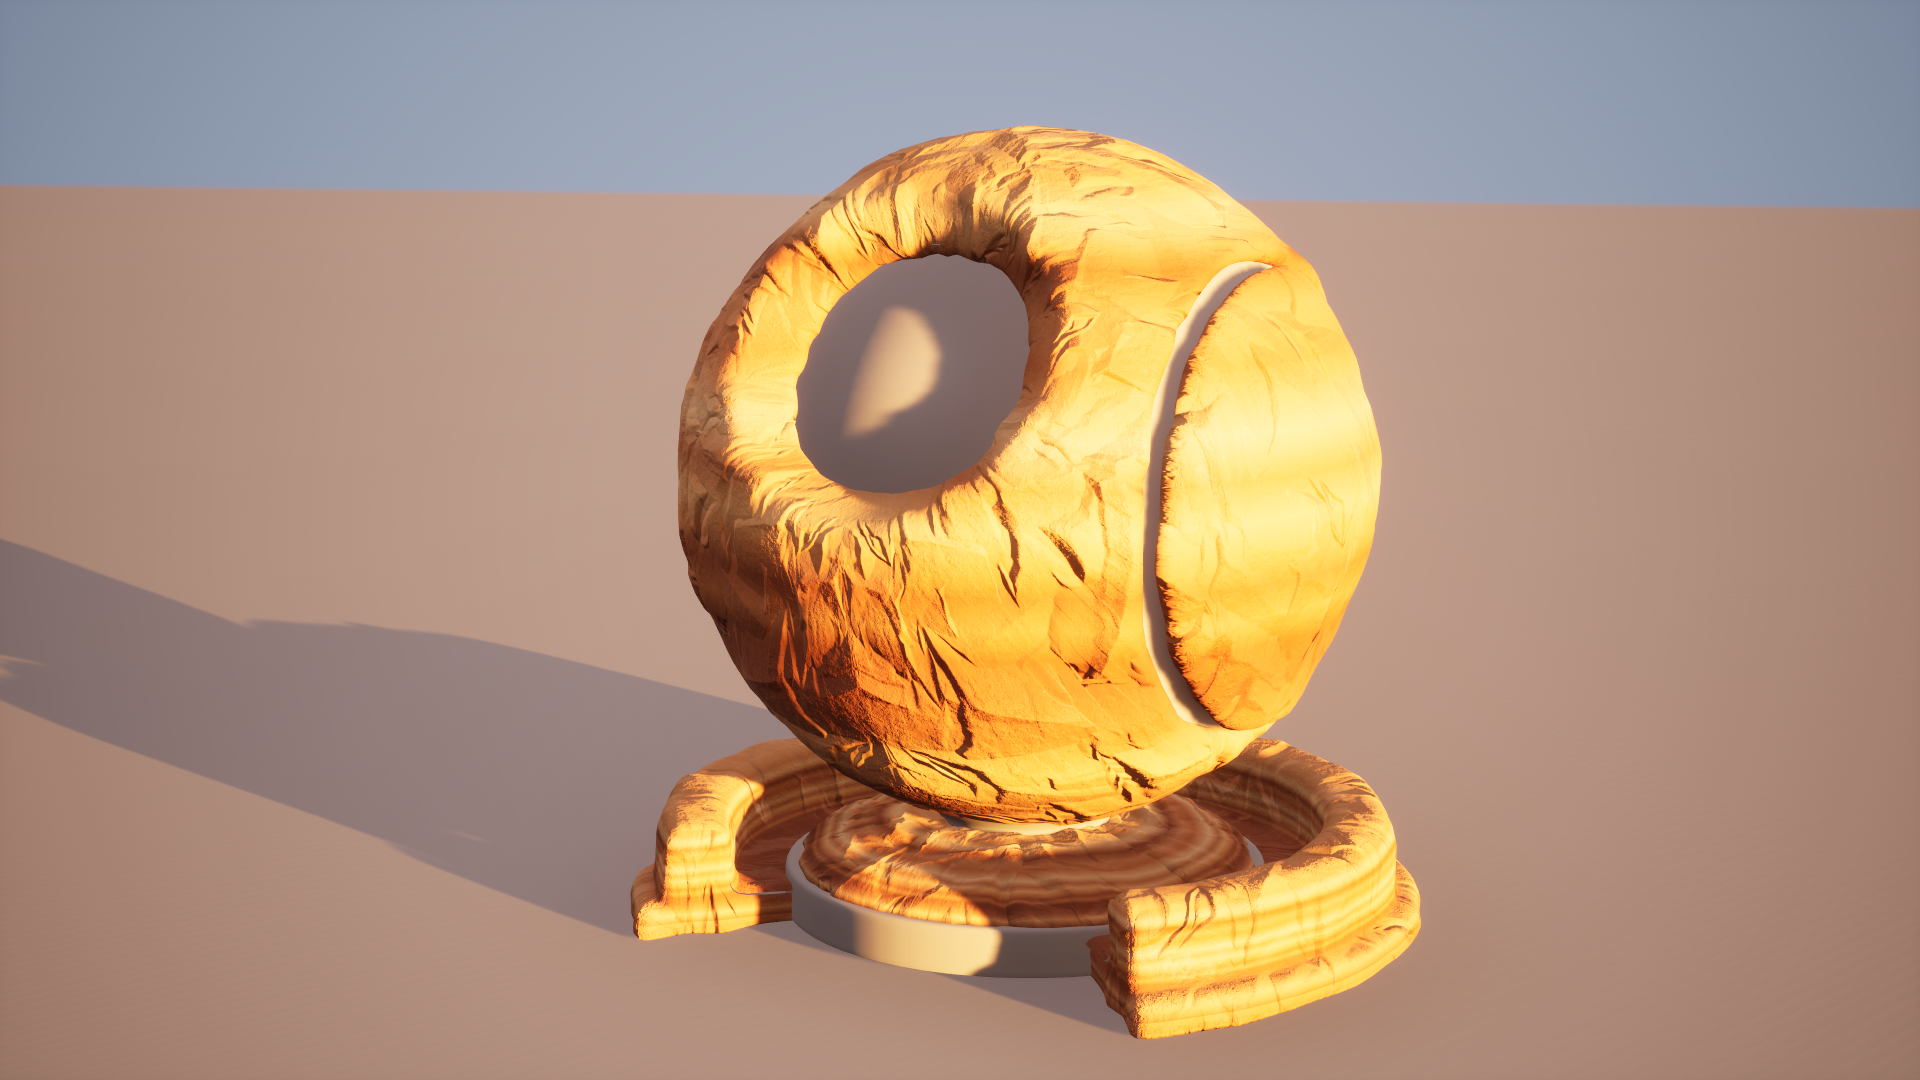
One trick I want to hilight is with the diffuse color here. You may notice that the cliffs both have pretty simple gradients as the texture output. This is because, I wanted to be able to play with the color distribution in engine. If you look at pictures of places like Zion National Park or Bryce Canyon National Park you can see that the canyons have an awesome vertical gradient, and I wanted to represent that in the engine, but I wasn’t exactly going to be able to orient the UV’s of the landscape. So, to achieve that effect, I did some clever stuff in Unreal.
Unreal Engine
This section is going to be a little bit shorter, most of the interesting work was shown in the previous two sections, and here we really just tied it together. But I wanted to demonstrate some of the fun tricks I implemented in the material shaders.
Like I mentioned in the previous section, the canyons that I used for reference have some really beautiful gradients that go from the base of the mountains to the top. And I thought it would be very clever if I used a gradient I sampeled from reference, and distributed it based on the Z Height of the model, rather than the landscape coordinates.
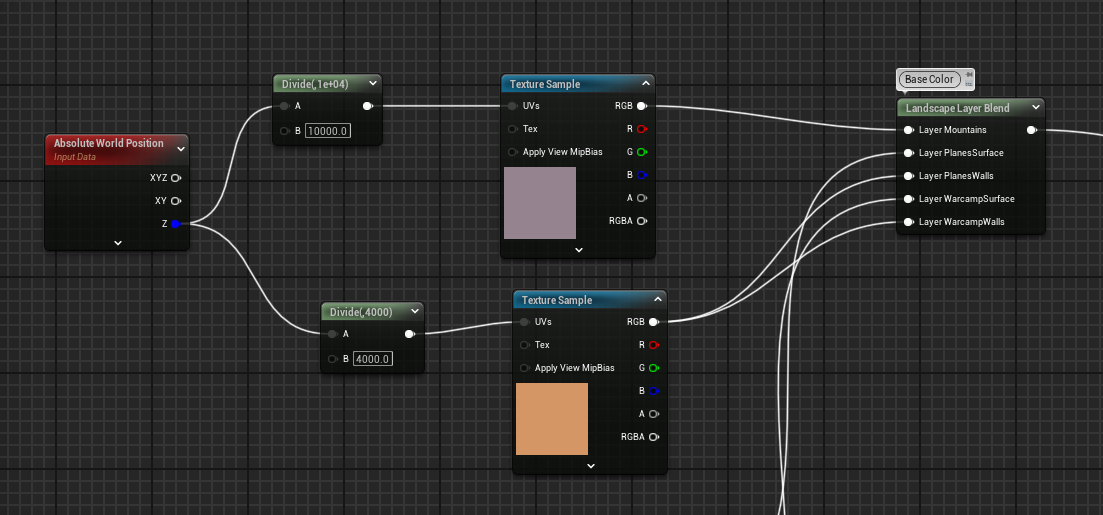
This allows me to tune the tiling of the gradient, and scale it over the massive landscape I had created, and tweak the settings to get the perfect result. In retrospect, I could have taken this a bit further by adding some noise based on the X,Y position of the landscape as well, to add a bit more irregularity to the gradient, but ultimately, I was happy of the results as seen up top.
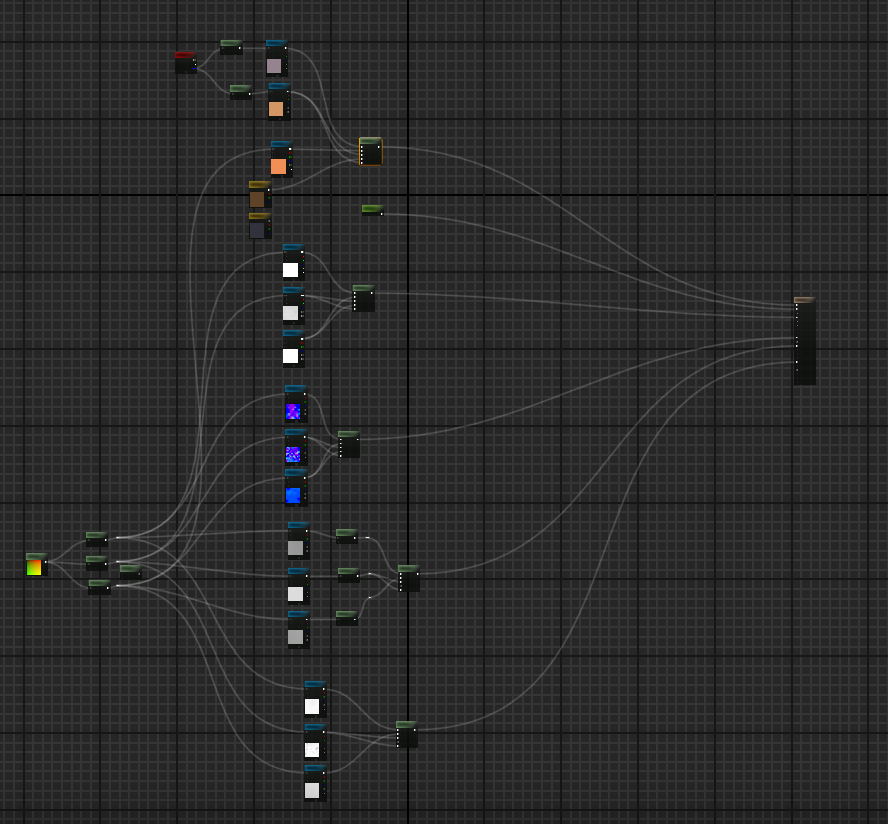
The whole landscape graph is below, if you are interested in how it’s strung together, but it’s nothign too fancy, just the textures generated by substance plugged into material layers, then dialing in the tiling and amplitude of displacements to (my) taste.
The models seen in the preview render are courtesy of enterables , I wanted to have some buildings hanging out to flush out the scene, even though the focus of this project was on the environment.
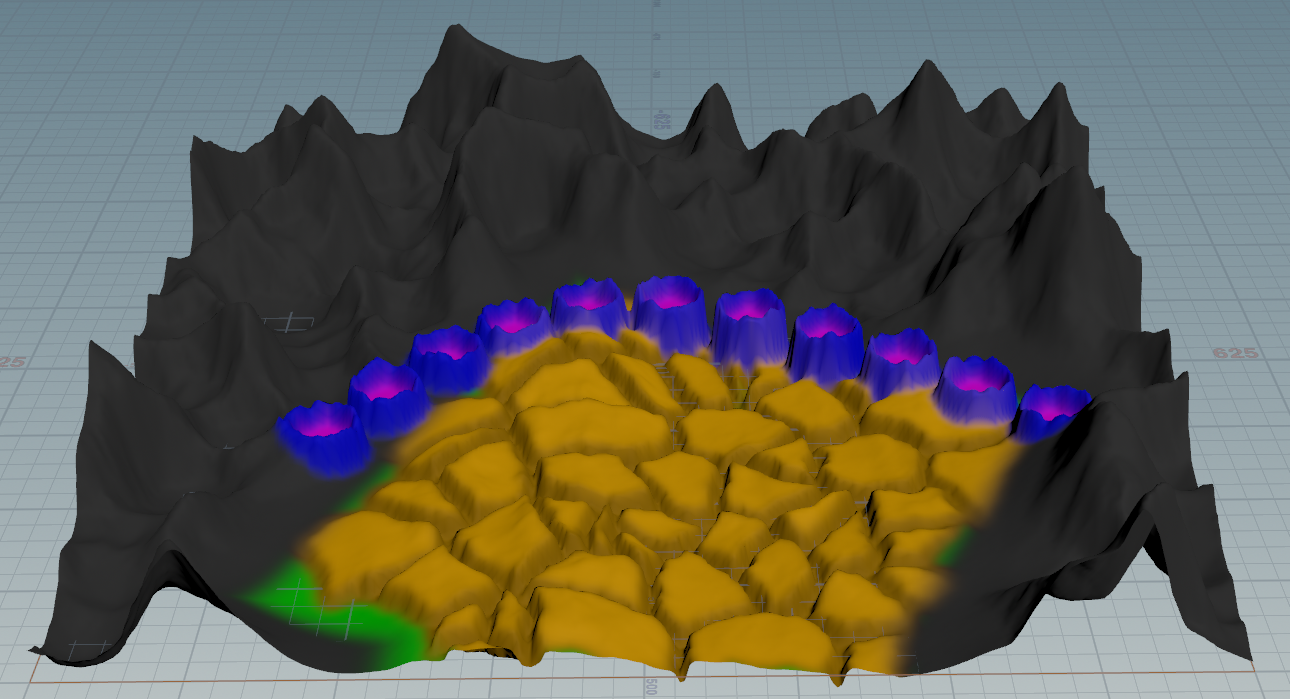
Now, just in case you’re one of the freaks like me who skipped the end result in favor of the technical write up, here’s everything in action!
And that’s pretty much it! If you got to the end of this, thank you for reading! I hope you found it informative, and interesting.